So I finished doing the signs, so now I can work on the buildings. As of now, the left side of the buildings have their flat colors. I still have to do the right, center, vehicles, and pavement.
The signs that were too blurry, I'll still use as they appeared in JSR as long as they're further back.
01.11.2025 00:37 — 👍 0 🔁 0 💬 0 📌 0

The Hiragana and Katakana are fine and I can trace (or type) them out if it's just those present on a sign. But if there's Kanji mixed in that I can't figure out, then the either part of, or all, of the sign's getting tossed.
#JetSetRadio #JSR
08.10.2025 05:35 — 👍 0 🔁 0 💬 0 📌 0


But there's some that are so blurry, it's hard to discern what the Kanji says in some of these. I've been using (kanji.sljfaq.org) to get an idea, but again, the blurriness of some of these is killing me. I may just leave some of these blank and just use the logos.
#JetSetRadio #JSR
08.10.2025 05:35 — 👍 0 🔁 0 💬 1 📌 0


#WIPArtwork Time!
I finished the 2nd Sketch for Piranha's background. But Before I start doing the Flat Colors, I gotta do some of the signs that'll be visible. I'm having some success tracing some of the more legible ones, Like Ken and Mary and Bom Bom.
#JetSetRadio #JSR
08.10.2025 05:35 — 👍 1 🔁 0 💬 1 📌 1
Israel is now added to the Blocked countries list for the Blue Fish Apartment. Can't stop them from visiting the other galleries, but I can at least tell them to kick rocks from visiting the BFA.
23.09.2025 16:50 — 👍 1 🔁 0 💬 0 📌 0

Links
Art of DPX Quick Links Artwork of DeadPhoenX Quick Links Due to the frequent nature of my artwork and the ID requirements set forth by the United Kingdom, I must unfortunately block visitors from t…
I've set it up so that UK visitors aren't fully blocked, but instead get redirected to my Links page instead. The closest UK visitors will get to all artwork posted to BFA will be through NewGrounds.
artofdpx.com/links/
25.07.2025 21:07 — 👍 0 🔁 0 💬 0 📌 0

It is done. I'm sorry to my UK peeps. But I gotta block ya'll from the Blue Fish Apartment. You already know I draw NSFW artwork, and I got age gates up for artwork that needs them. But the UK wants me to see your ID, or give it to a 3rd party. I ain't about that life.
25.07.2025 21:07 — 👍 2 🔁 0 💬 1 📌 1

I made the decision to put her in the same universe as Belinda Cauldron. The previous times I drew Harriette, she was supposed to be chubby. But It never came out right or wasn't obvious. So I referenced Marie Bunny for this.
#OC #OriginalCharacter #pinup #Chubby #plussized #thicc #lingerie
22.07.2025 04:55 — 👍 3 🔁 0 💬 1 📌 0

#OldArtwork
Harriette, Letter Carrier of the White Rabbit Post
Originally uploaded June 1, 2021
Continuing with my OCs for 2021, here's Harriette. Before this, Harriette had only two pics for Easter, and both NSFW. Now, she has a job!
#OC #OriginalCharacter #pinup #Chubby #plussized #thicc
22.07.2025 04:55 — 👍 4 🔁 0 💬 1 📌 0

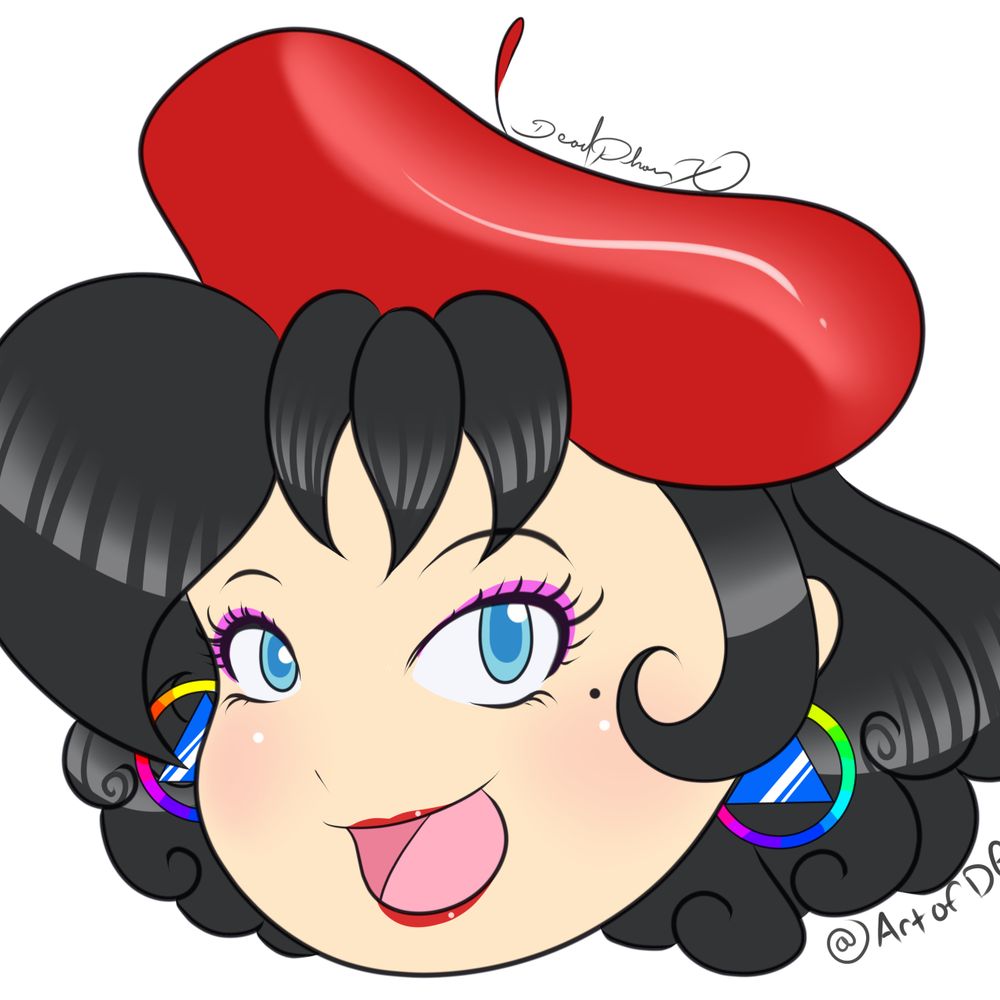
But why is she the "Nameless Mermaid". It's an inside joke that I decided to run with. She's one of my many OCs that started from a hentai idea well over a decade ago. She had a name. But over the years... I forgot it! I remembered her design.
#OC #OriginalCharacter #mermaid #mermay #NSFW #R18
22.07.2025 04:26 — 👍 0 🔁 1 💬 1 📌 0

Previously, I drew her underwater. But since I was still using GIMP, I had no confidence in using filters to express that "feel" of being underwater. This time around I'd apply filter that to this pic. Nameless would also get a redesign for this.
#OC #OriginalCharacter #mermaid #mermay #NSFW #R18
22.07.2025 04:26 — 👍 0 🔁 0 💬 1 📌 0

#OldArtwork
Home of the Nameless Mermaid
Originally uploaded May 24th, 2021
Around this time, I was nearly done with building the new BFA website and had some time. So I draw up one of my other OCs, the Nameless Mermaid. It had been 6 years since I drew her.
#OC #OriginalCharacter #mermaid #mermay
22.07.2025 04:26 — 👍 7 🔁 1 💬 1 📌 0

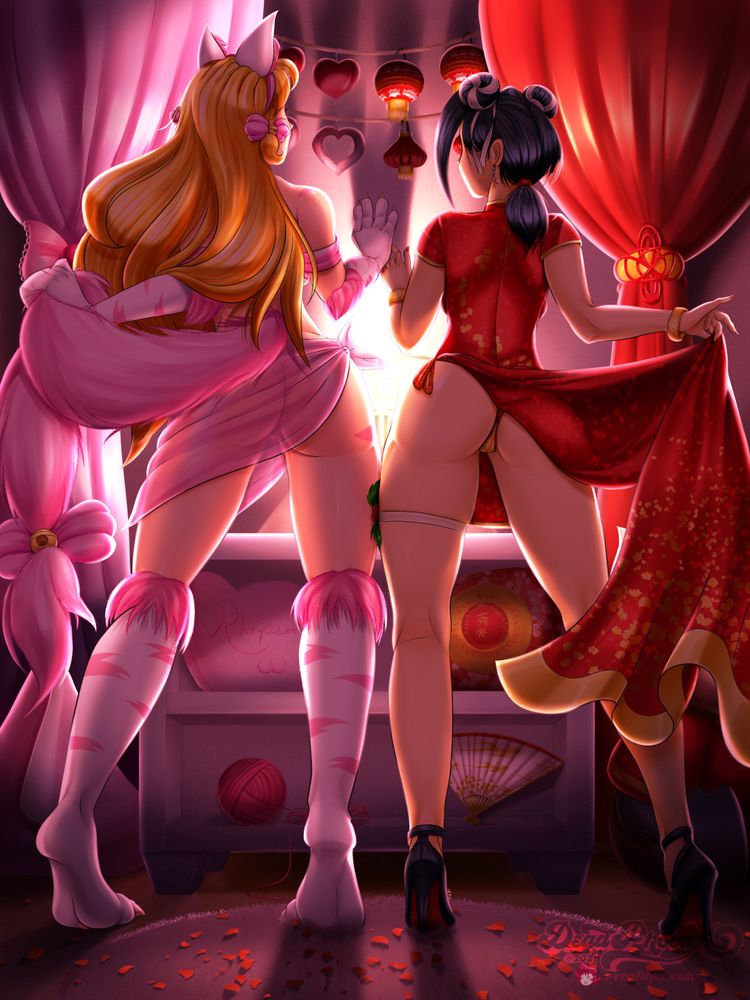
The ladies here are Rhapsody and Xiuying, my OCs. For years, there was a running theme with their silly sketches, both of them being drawn together since their holidays, Valentine's Day and Lunar New Year, tend to fall on the same month.
#OC #OriginalCharacter #LunarNewYear #ValentinesDay #catgirl
22.07.2025 04:09 — 👍 3 🔁 0 💬 1 📌 0
#OldArtwork
Sharing The Love ~ Lunar New Year and Valentines Day
Originally uploaded Feb. 16, 2021
After many silly sketches, I did a full render of these two together. I was inspired to do this from a photo by Wakura no Camera.
#OC #OriginalCharacter #LunarNewYear #ValentinesDay #catgirl
22.07.2025 04:09 — 👍 1 🔁 1 💬 1 📌 0

Artwork Update 2024 - A Whole Lot Just Changed by DeadPhoenX on DeviantArt
Glad ya like it.
The job mentioned I've quit since 2020. But I have another job that's full time. However it's because of this job I have now that I had to shut down commissions since January 2024.
Detailed it on my DeviantArt. My apologies.
www.deviantart.com/deadphoenx/j...
15.07.2025 00:38 — 👍 0 🔁 0 💬 1 📌 0
Target down! That'll teach ya! Don't profit off my shit!
14.07.2025 02:45 — 👍 0 🔁 0 💬 0 📌 0

Oh this schmuck! He took my Belinda Cauldron design from Redbubble and is selling it on his own merch on a different site.
Report this bum!
printerval.com/main-circle-...
Remember, I only sell merch on Redbubble and nowhere else. Accept no #ArtThief, no imitations!
12.07.2025 07:59 — 👍 0 🔁 0 💬 1 📌 1
noclip
A digital museum of video game levels
Once I got the angle, I did a rough trace of the whole thing. I'll be adding on details as I go along.
I'll go ahead and link the site I used, in case anyone else needs them for whatever project you guys wanna do.
#JetSetRadio
noclip.website#JetSetRadio/...
05.07.2025 03:46 — 👍 0 🔁 0 💬 0 📌 0


#WIPArtwork Time!
Finished shading in Piranha. Now onto the background. I actually did this before shading in Piranha, and it took a lot of trial and error. I booted up the game to get some shots of this section of Shibuya-cho. But it didn't go so swimmingly.
#JetSetRadio
05.07.2025 03:46 — 👍 0 🔁 0 💬 1 📌 0
By this point, I already quit Michaels and went back to freelancing (actually quit in October 2020). I had a bunch of free-time once again. So the time came to finally start going full speed ahead with building the new Blue Fish Apartment, away from FC2 Blog.
On the next Old Artwork post, 2021!
02.07.2025 00:10 — 👍 0 🔁 0 💬 0 📌 0

Azuki Pocky ~ Azuki-Tan (Pocky Day 2020)
The sixth ranger to the Pocky-tan, meet Azuki-tan!2020 sucked. So let’s end things on a high-note. This is Azuki-tan, the 6th Pocky-tan. Obviously this was supposed to be for Pocky Day, which was o…
I had this long compound frame that had 5 of the Pocky-tan from 2018. But there was a 6th spot that was empty. So she said I should add one more. The original 5 were based on the 5 flavors that were officially available in the U.S. So I added one that was an import!
artofdpx.com/azuki-pocky-...
02.07.2025 00:10 — 👍 0 🔁 0 💬 1 📌 0

#OldArtwork
Azuki Pocky - Azuki-tan (Pocky Day 2020)
Originally uploaded December 14, 2020
My final pic for the cursed year, and my only self-started pic that wasn't a commission for the year. The idea to create Azuki-tan came from a co-worker of mine.
#pocky #pockyday #gijinka #kimono #japanese
02.07.2025 00:10 — 👍 0 🔁 0 💬 1 📌 0
I draw big anime tiddy, sci-fi stuff, and I sometimes animate things!
Commission info/more socials/YouTube/more at constructcoreworks.com
Welcome back to Little to no Rule34, Now in blue(er) Skies, join us as we post some obscure characters for you to check around, and lewd around.
Pfp by JeremyTeufort.
im mr pussy (NOT violent!!!)
stuck boat connoisseur
harm reduction advocate
links at http://mrpussy.xyz :~)
readme: nat.haus
sabotage AI
philly 🏴🖖🪆🇵🇸 go birds, fuck ICE, free palestine
Father, filmmaker, fisherman, prostidude
Official Glaze project Bsky account.
Glaze/Nightshade @ University of Chicago
https://glaze.cs.uchicago.edu
https://webglaze.cs.uchicago.edu
https://nightshade.cs.uchicago.edu
covering DnB, Jungle, Breakcore, etc
Reposting from the original account.
I wrote a lot of things on Gamefaqs many moons ago. I try to create things to celebrate fighting/video games. This includes collages, crafts, greeting cards, pixel art, and more. Just trying to have fun and spread positivity.
Bakshi Art and Animation. Run by Ralph and Eddie Bakshi. Animation art shop: https://www.ebay.com/str/bakshianimationart
Website: www.bakshistudio.com
I make movies. I watch movies. I love movies.
artist
https://boosty.to/devilhs
🔞 Sonic IDW fan, ZZZ enthusist, All artists deserve their pay and rights, fuck gen AI, all are welcome...except the MAGA crowd
ᴅʀᴀᴡɪɴɢ ᴛʜɪᴄᴄ ᴡᴏᴍᴇɴ ꜱɪɴᴄᴇ 2009 © //
content suitable only for 18+ . 🗣️Hablo español
For more drawings: patreon.com/linkartoon
Digital Artist. NSFW.
I draw pretty ladies (and boys) doing pretty lady stuff
STORE: rizdraws.com
The vintage Toon and pinup man!. (comms open)
thedarkcartoon1@gmail.com
https://thedarkcartoon.carrd.co
Pixel artist and gamedev. Making Project Heat, a beat'em up / fighting game hybrid.
I repost A LOT of art I like, sometimes spicy, so beware.
Check my art in the media tab or with the tags: #pixelart #gamedev
🇸🇪 BOI 30
I draw stuff!
CSP
Wacom Cintiq 16
Working on the Visual Novel " My Pig Princess " !
Play it and get some behind the scenes stuff on Patreon:
http://patreon.com/CyanCapsule
real vinny social media bluesky twitch streamer youtube videos music red vox speen pizza corruption melpert guy
http://linktr.ee/vinnyvinesauce
I think I'm pretty sure I draw anime porn
Art Store >> https://fuyahana.itch.io/
Patreon >> https://www.patreon.com/fuya
Other Socials >> https://linktr.ee/fuyahana
Official BlueSky account for Arc System Works America, Inc., the publishers of the Guilty Gear & BlazBlue series.
Website: arcsystemworks.com